




Who This Guide Is For
- Developers and operators planning senior-living residences, assisted-living communities and care-support spaces.
- Interior designers detailing bathroom vanities, kitchenette sink units, utility cabinets and staff-service furniture.
- Contractors coordinating plumbing, ventilation, waterproofing, wall finishes and cabinet installation.
- Procurement teams comparing construction details, cleaning needs and replacement support.
Key Takeaways
- Classify cabinets by actual exposure and access needs. “Waterproof cabinet” is too vague to use as a specification.
- Treat sink bases, vanities and laundry units differently from dry wardrobes. They do not live the same life after handover.
- Put edge treatment, pipe holes, bottom panels, toe-kicks and site cuts on the drawing. These details often decide whether a cabinet survives a small leak.
- Match cleaning instructions to the finish and to the facility’s approved process.
- Keep a modest but usable replacement record: cabinet code, finish, edge material, hardware and a few clear photos.
Moisture Resistant Cabinet Materials: High-Humidity Risk Table
On mobile, swipe left or right to view all table columns.
| Cabinet zone | Moisture and maintenance exposure | Construction starting point | Details to specify | Replacement control |
|---|---|---|---|---|
| Accessible bathroom vanity | Splash, basin overflow, humidity, frequent cleaning | Moisture-appropriate plywood or specified board by component | Sealed edges, basin and trap cut-outs, wall clearance, valve route | Cabinet and finish code; spare door and hardware reference |
| Kitchenette sink base | Plumbing leaks, cleaning, floor splash and service access | Moisture-appropriate carcass with a protected bottom | Bottom edge, pipe openings, service void, toe-kick and inspection access | Separate carcass, door and hardware records |
| Laundry or housekeeping cabinet | Humidity, detergents, cleaning equipment and repeated impact | Substrate and decorative surface selected for actual exposure | Edge build-up, appliance clearance, ventilation, fixing and cleaning compatibility | Record finish, shelf load, hardware and location code |
| Dry resident wardrobe | Normally dry use with occasional cleaning | Melamine-faced board or other dry-area construction | Edge quality, rail and shelf fixing, door and hinge adjustment | Retain decor, thickness, edge-band and identifiers |
| Staff utility or common storage | Frequent contact, cleaning and varied loads | Durable decorative surface on a substrate suited to the installation | Corner protection, shelf spans, cleaning routine and wall fixing | Location-specific component and hardware code |
Why High Humidity Changes Cabinet Specification
Humidity is only one way moisture reaches a cabinet. Supply lines can drip, a drain connection can loosen, wet mopping can reach the toe-kick, and a cold wall can create condensation. A vanity may look fine on the day it is inspected while a slow leak is wetting the inside face of the carcass. By the time the door swells, the original fault can be hard to find.
For each wet-risk cabinet, record four things: where the water is likely to come from, its route into the cabinet, how quickly someone can spot it, and what they can remove or open to deal with it. That is a more useful starting point than assigning the same “moisture-resistant” note to every panel. A suitable board can buy time; it does not remove the need to control moisture in the building.
The EPA moisture-control guidance covers moisture control in design, construction and maintenance, including plumbing and HVAC. For cabinetry, the practical implication is straightforward: the cabinet detail has to work with the plumbing, ventilation, cleaning and repair routines already planned for the building.
Which Cabinet Materials Suit High-Humidity Care Zones?
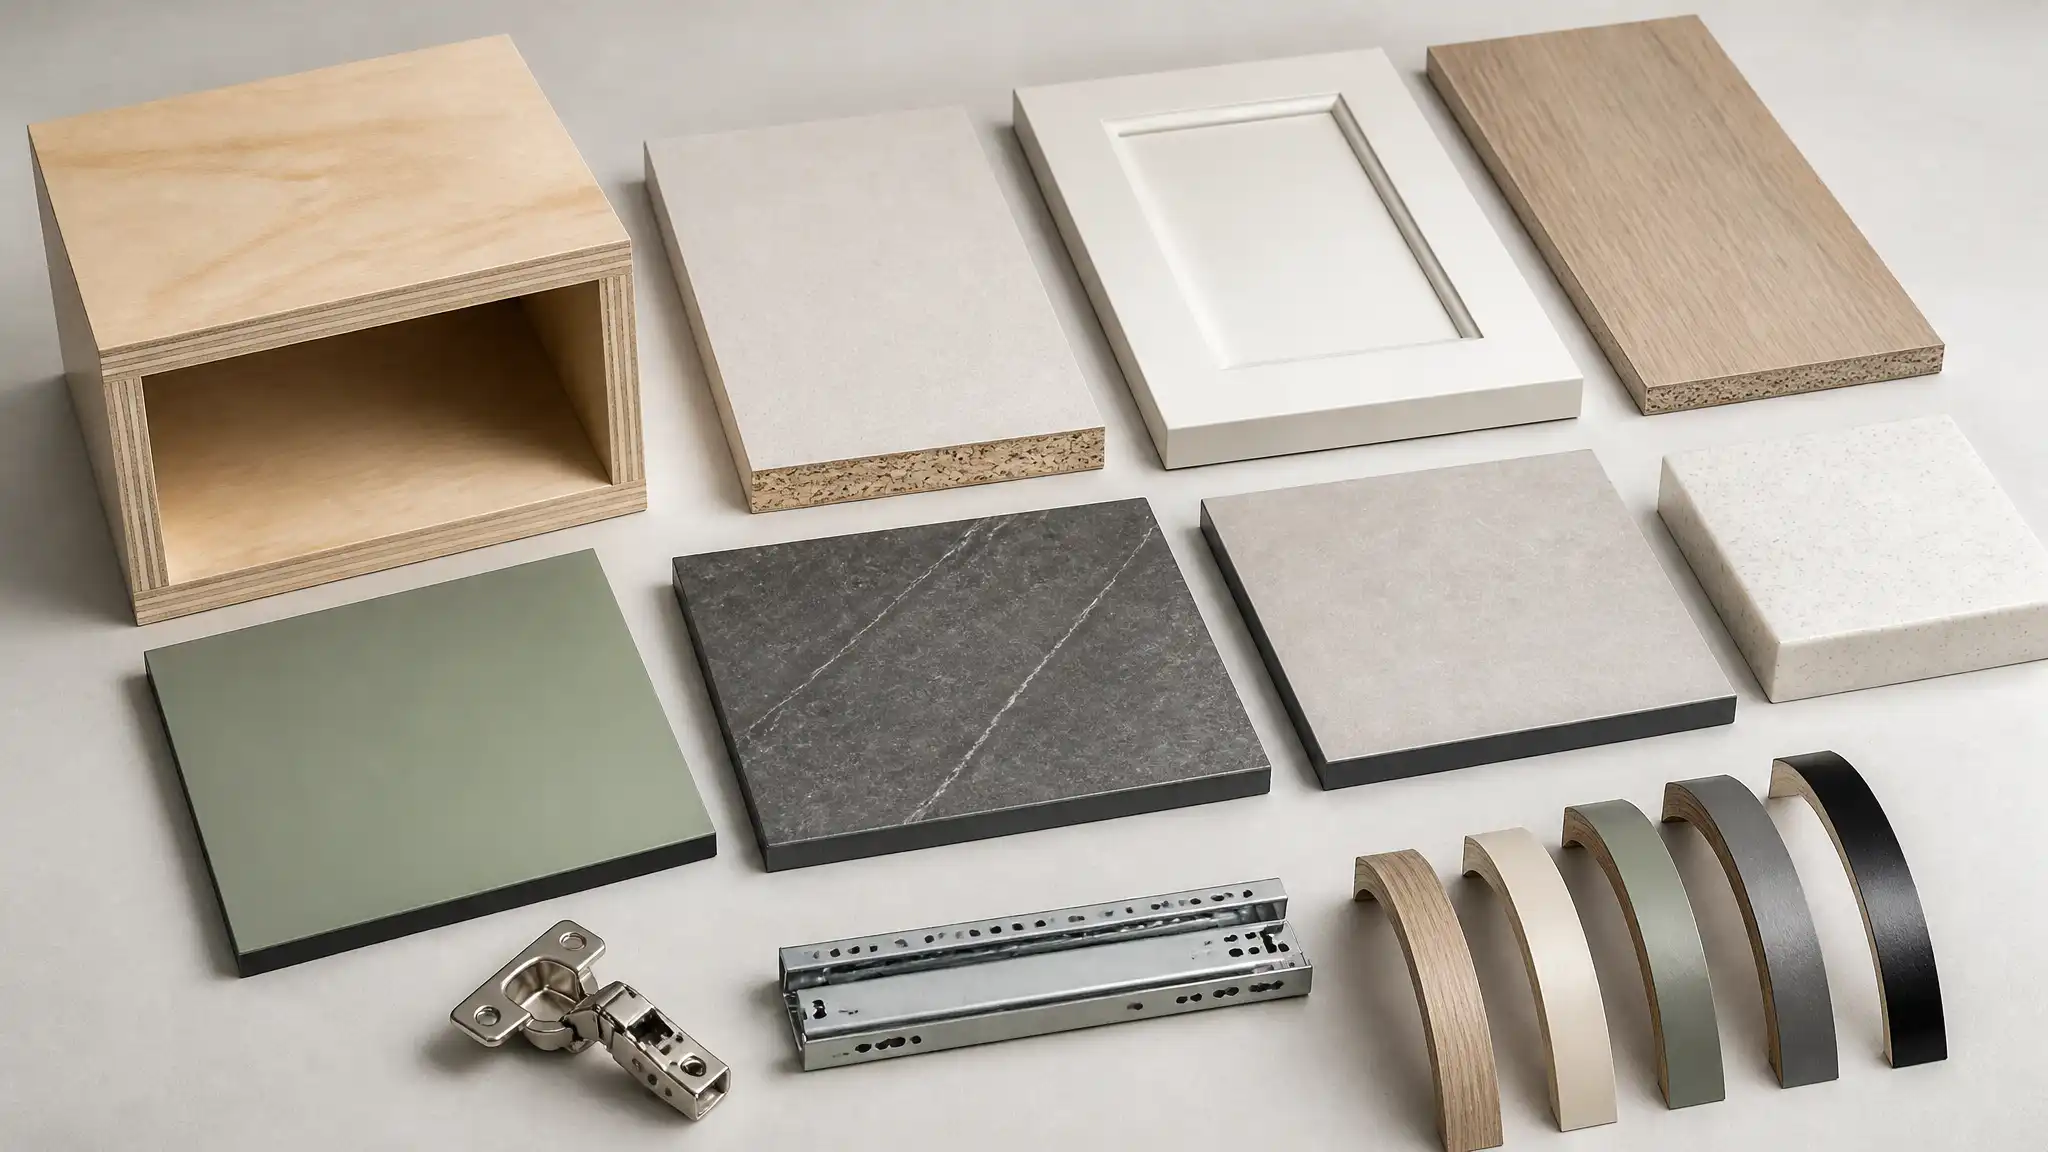
Plywood and moisture-appropriate panel construction for wet-risk carcasses
For sink bases, vanities and laundry units, plywood or another specified moisture-resistant panel is often a sensible place to start. The drawing still needs to say what is being supplied: thickness, panel construction or grade, exposed-edge finish, bottom-panel build-up and treatment for each service hole. Plywood is not immune to standing water or a leak that runs for days.
Avoid a blanket note saying “plywood cabinets.” A vanity side beside a basin, a shelf in a dry upper compartment, a removable plumbing panel and a painted door all have different jobs. A component schedule makes those differences visible and avoids paying for a high-risk construction where it adds little value.
MDF and painted fronts: use only with a defined exposure and edge plan
MDF gives painted and profiled doors a clean surface, but the edges and cut-outs need careful preparation. In a splash-prone location, specify the board grade, paint system, edge preparation, sheen and sample approval. A good-looking painted face does not protect an untreated cut edge around it.
Think about replacement before the doors go into production. Can a damaged front come off without disturbing a grab rail, a countertop or plumbing? Common door sizes, hinge drilling and finish codes are worth recording while the project information is still easy to find.
Melamine, PET, HPL, and other decorative surfaces
Melamine-faced board usually works well in dry wardrobes and storage. PET and similar polymer-faced panels can also work when the substrate, edges, heat exposure and cleaning routine are known. HPL is often considered for harder-working support areas. In each case, the face material is only part of the decision; joints, edges and installation matter just as much.
Ask for the manufacturer’s surface-care guidance, then have the operator compare it with the cleaning products already approved for the site. Do not put a chemical recommendation into the cabinet specification unless that compatibility has been confirmed.
What Details Keep Moisture Away From Vulnerable Cabinet Edges?
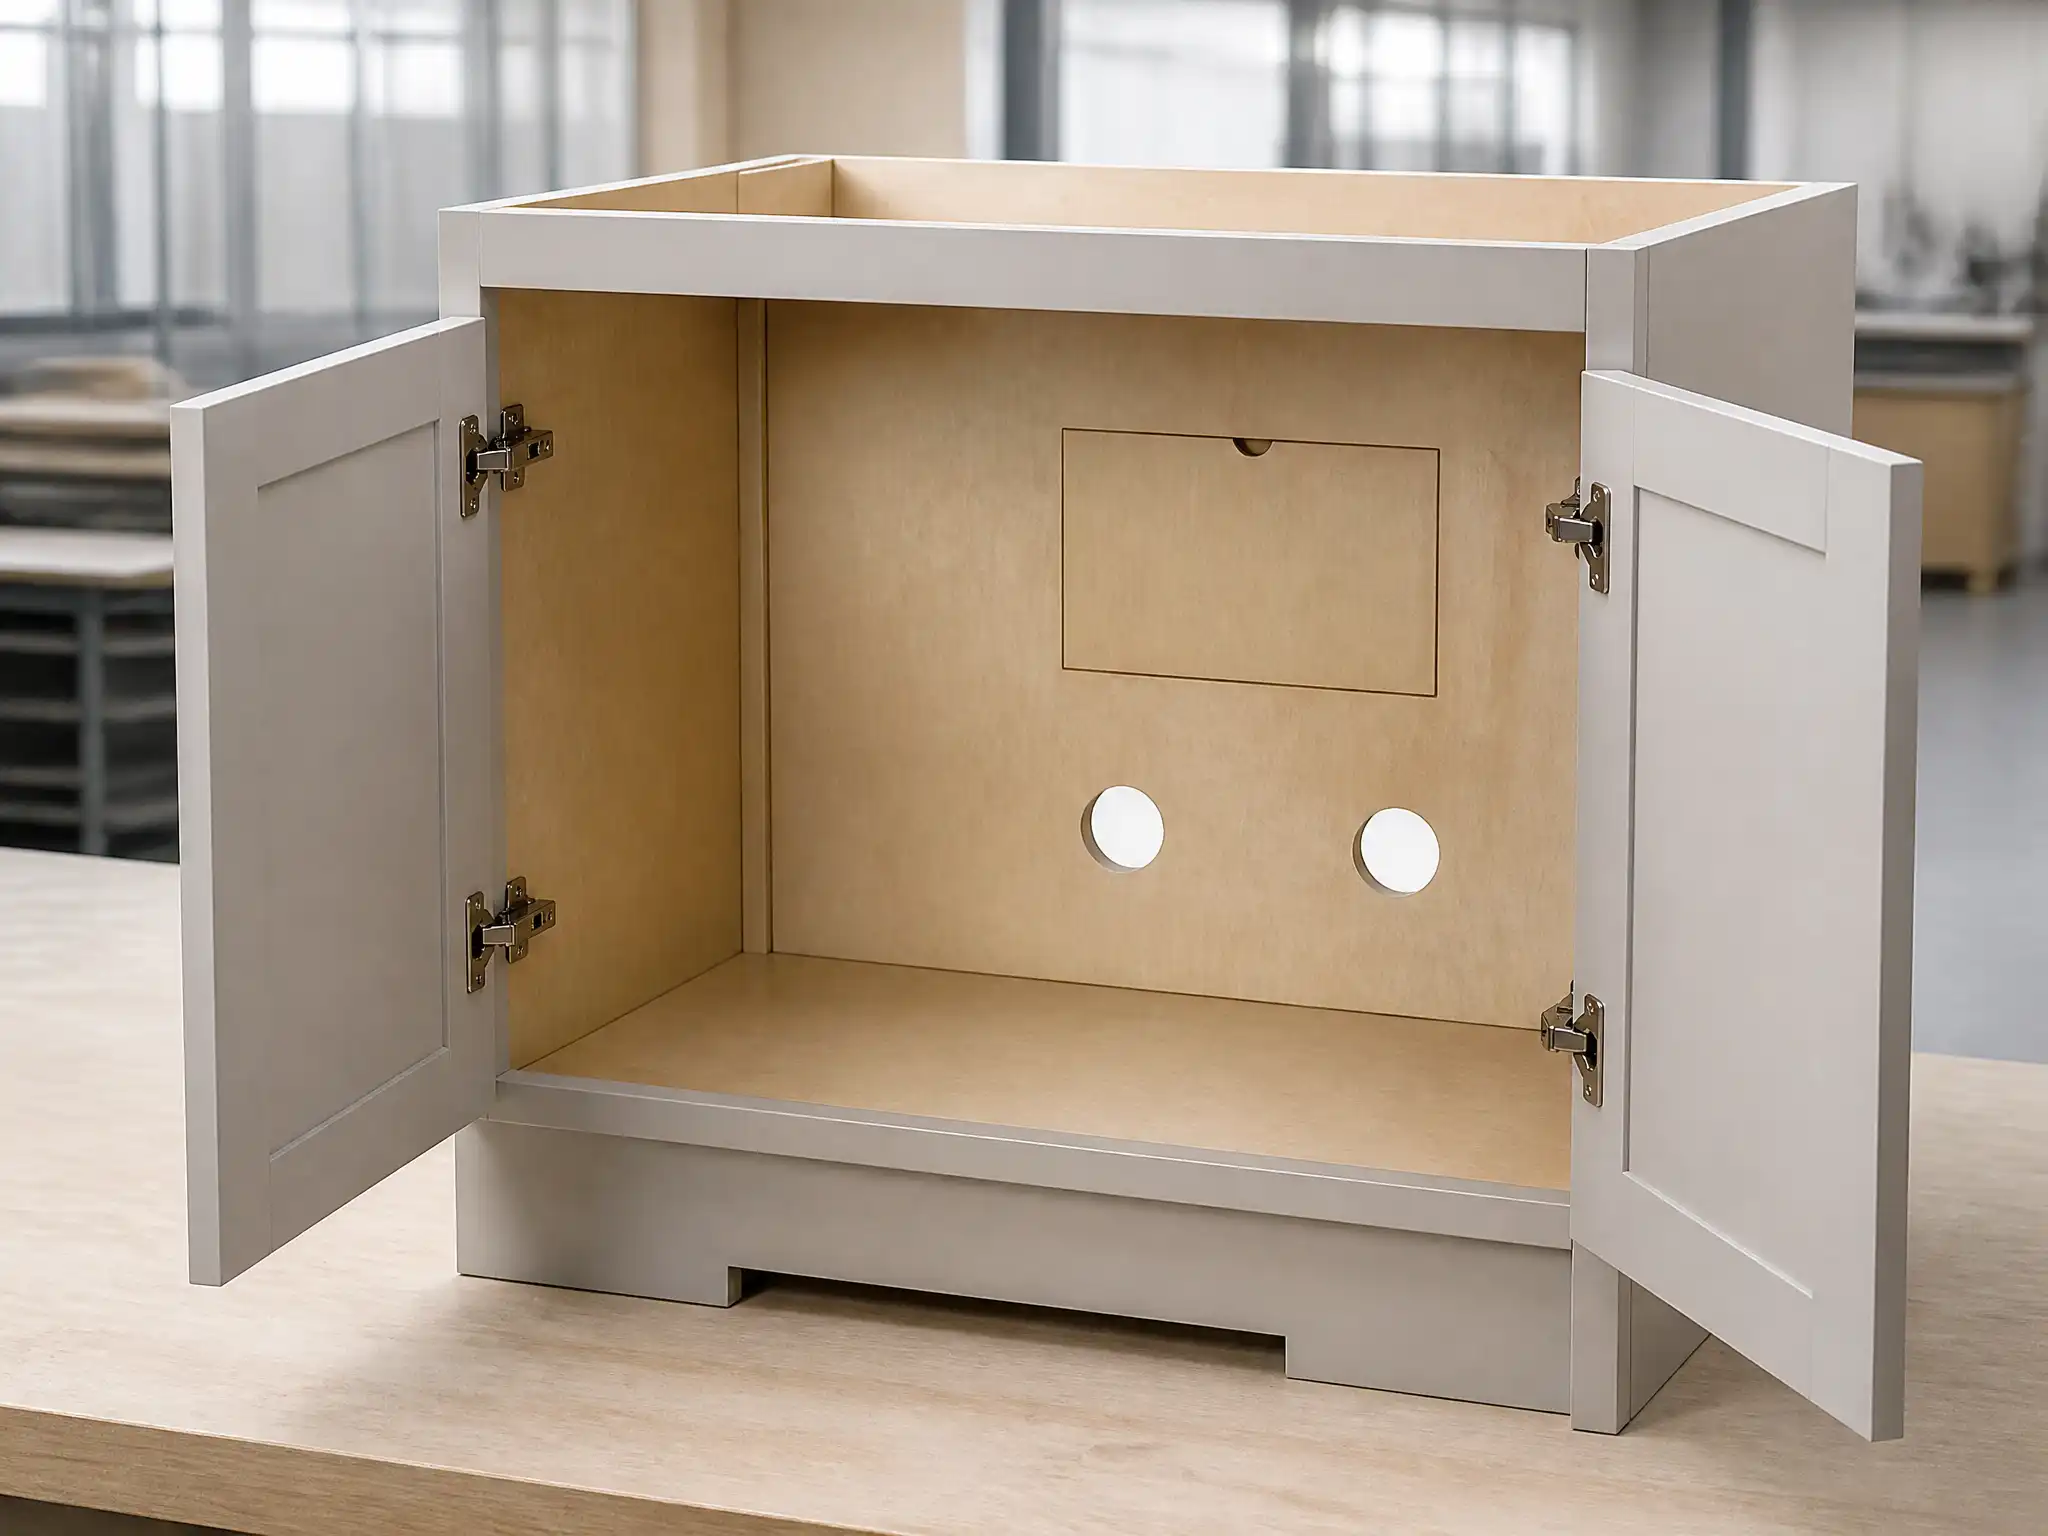
The drawing should show where water could get in and how someone will inspect the cabinet later. “Seal all edges” is not enough for a sink base or vanity. Call out the visible and concealed edges, pipe openings, bottom panel, rear service zone, toe-kick, wall return, countertop line and any part that may be cut on site.
On mobile, swipe left or right to view all table columns.
| Detail condition | Better specification response | Why it matters | Avoid |
|---|---|---|---|
| Pipe through rear panel | Show the service-hole location, finish the cut edge and retain valve access | Limits exposed substrate and allows repair | Oversized unprotected field holes |
| Sink-base bottom | Detail the protected bottom panel and floor or plinth relationship | Stops floor-level moisture sitting at exposed edges | Assuming a door hides damage |
| Vanity basin opening | Confirm basin, countertop, splash line and sealant interface | Coordinates water paths across several trades | Cutting the cabinet after countertop installation without edge treatment |
| Wall return or end panel | Specify the edge finish and clearance at wet wall zones | Keeps the interface cleanable and controllable | Leaving raw panel core at a tiled return |
| Removable access panel | State its fixing method, finish and service location | Supports valve and trap work without damaging visible panels | Sealing access behind fixed cabinetry |
| Installation trimming | State which component may be scribed and how the cut edge is finished | Prevents uncontrolled cuts in moisture-sensitive parts | Verbal “trim as needed” instructions |
In an accessible bathroom, the room layout takes priority. Cabinetry must not compromise required clearances, support locations or service routes. Before production, send the cabinet manufacturer the approved plan, basin and countertop selection, plumbing positions and relevant wall-construction details. This is the point at which a difficult service opening can still be moved on paper.
How Should Cleaning and Maintenance Shape the Material Choice?
Cleaning is part of the operating environment. The schedule should identify the visible finish, exposed edges, the manufacturer’s care guidance and any parts that can be removed or adjusted during maintenance. The operator can then check that advice against its own approved products, staff training and safety procedures.
Skip claims such as “chemical-proof,” “mold-proof” or “maintenance-free” unless a named product and test condition support them. Plain instructions work better: wipe up splashes, do not leave water at cabinet bases, keep abrasive pads and unapproved solvents away from finished surfaces, and keep service openings clear. The EPA moisture and mold prevention tips likewise advise dealing with moisture problems promptly and not enclosing wet materials. A small plumbing issue becomes a cabinet-replacement issue when it stays hidden.
For a repeated facility programme, hand over the information that a maintenance person will actually need: finish sample, care note, room and cabinet code, hardware reference, plumbing-access notes, spare-parts list and photographs of the unusual details. “The white vanity door in room 12” should be enough to start a repair request, but it should not be the only description available.
Factory Insight: Control High-Humidity Cabinets Before Packing
At KEJIA, the work starts with the drawings. We compare the cabinet schedule with the basin or sink, plumbing, wall and floor finishes, ventilation, selected finish and expected service access. Each wet-risk cabinet code needs a production record covering the carcass, panel thickness, edges, cut-outs, bottom panel, door finish, hardware and removable access parts.
QC should look closely at the boring places: cut edges, the underside of the cabinet, pipe openings, hinge drilling, door gaps and the fit of the access panel. They are the places most likely to be missed once the cabinet is installed. Packing also needs to preserve the room and cabinet code on wet-zone doors, removable panels and dedicated hardware.
If the basin, plumbing centre, countertop or wall finish changes after approval, stop and revise the affected cabinet code. An installer should not have to invent a pipe hole in a finished component on site.
Six High-Humidity Cabinet Mistakes to Prevent
1. Treating moisture-resistant board as waterproof construction
A board grade may give more tolerance, but it will still fail when water is left standing, edges are left raw or a leak goes unnoticed. The board, the detail and the response process all have to be agreed.
2. Leaving plumbing cut-outs to the installer
Unplanned holes expose raw edges and can leave valves out of reach. Issue plumbing positions before production; if a site cut is unavoidable, state who approves it and how the edge is finished.
3. Choosing a finish without checking cleaning compatibility
Cleaning routines vary from one operator to another. Obtain the surface-care guidance, have it checked by the operator and put it in the handover pack. A smooth surface is not automatically compatible with every product in a cleaning trolley.
4. Sealing away valves and traps behind fixed cabinetry
Make valves and traps reachable. A removable panel or service void is much cheaper than cutting through finished cabinetry during a routine repair.
5. Ignoring floor and wall interfaces
Water gets in at the base, toe-kick, tiled return and unsealed trim points. Coordinate the cabinet with the waterproofing, tile, floor and countertop before drawings are released.
6. Losing replacement records after handover
Keep the cabinet code, finish sample, edge material, door orientation and hardware reference with the maintenance documents. Without them, a small repair can turn into weeks of guesswork.
High-Humidity Cabinet Specification and Handover Checklist
- Map each cabinet zone for splash, leak, humidity, cleaning and service-access risk.
- State the substrate, thickness, finish, edge treatment, bottom-panel detail and toe-kick build-up by cabinet code.
- Lock down basin, sink, countertop, plumbing, valve, trap and ventilation positions before machining begins.
- Draw the service holes and access panels. Mark where a site cut is allowed and how it is finished.
- Check wall and floor finishes, waterproofing interface, fixing substrate and clearances.
- Approve door samples for colour, sheen, texture, edge detail and acceptable batch variation.
- Review hinges, runners, door gaps and the logic for any removable panel.
- Put compatible surface-care advice into the facility cleaning process.
- Give the operator a simple response note for a leak or damaged finish, including room and cabinet identification.
- Hand over room, cabinet, finish, edge-band, hardware and replacement-part records.
- Use room-coded packing for repeated bathrooms, kitchenettes and utility rooms.
- Ask for a material and maintenance recommendation before the production release.
For related decisions, see the hotel bathroom vanity material selection guide, apartment cabinet materials guide, and cabinet production readiness checklist.
Часто задаваемые вопросы
Are moisture-resistant cabinet materials waterproof?
No. A moisture-resistant substrate can suit a defined exposure, but it still needs protection from standing water, leaks, condensation and raw edges. The project should cover material, edge treatment, plumbing access, installation detail and the response to a leak.
Is plywood suitable for all senior-living cabinet components?
No. Plywood can be a good starting point for wet-risk or higher-load parts, while dry storage, visible doors and shelves may need other materials. Set the requirement by component and by exposure rather than using one board everywhere.
Can painted MDF be used in a bathroom vanity?
It can be considered for visible doors or panels when the grade, paint system, edge preparation, exposure and care requirements are clear. The painted face will not protect every unsealed edge or water event. The carcass, basin cut-out, plumbing void, ventilation and service access still need their own details.
What should operators do when water is found inside a cabinet?
Follow the facility’s approved safety and maintenance process first. Where it is safe, identify and stop the moisture source, record the room and cabinet code, and avoid closing wet material back up. The handover pack should say who needs to be contacted and what photographs or component details are required.
How should cleaning products be selected for cabinet finishes?
Use the manufacturer’s surface-care guidance alongside the facility’s approved cleaning process. Check the actual finish before introducing a new chemical, abrasive pad or disinfecting method. Do not prescribe chemicals in the cabinet specification without that check.
What spare parts are useful for wet-zone cabinetry?
The spare-parts list depends on the repeated cabinet codes and how the building will be run. Door and drawer-front references, hinges, adjustment plates, access-panel fixings, edge material, finish samples and cabinet records are often useful. Choose spares around parts that need fast, identifiable replacement.

Request a Moisture-Resistant Cabinet Material Recommendation
Send KEJIA the project drawings, wet-zone layouts, basin and plumbing information, expected cleaning routine and target handover date. We will review the carcass construction, door finish, edge protection, service access, packing and replacement records, then issue a material recommendation for the relevant cabinet codes.