





Who this guide is for
- General contractors coordinating cabinet delivery with flooring, stone, MEP, and appliance trades.
- Developers and procurement teams standardizing cabinet packages across repeated units.
- Design managers who need finish consistency without making installation impractical.
- Overseas B2B buyers comparing factory proposals for apartment, hotel, or build-to-rent projects.
Key takeaways
- Freeze a signed, unit-coded drawing package before releasing bulk production.
- Specify the cabinet carcass, exposed edges, hardware, and wet-zone details—not only the door color.
- Approve physical samples under the project lighting before confirming a batch finish.
- Use a room-by-room packing and labeling plan so cartons reach the correct unit and installation sequence.
- Inspect a pilot unit and pre-shipment sample before accepting a repeated production run.
How to prevent multi-unit cabinet project mistakes
On mobile, swipe left or right to view all table columns.
| Common mistake | What repeats across the project | Control to require before production | Owner |
|---|---|---|---|
| Issuing drawings with unresolved dimensions | Gaps, filler changes, appliance conflicts | Signed-for-construction drawings and an exceptions log | Contractor + designer |
| Naming only a finish color | Color, sheen, and edge differences | Approved physical door, carcass, edge-band, and countertop samples | Designer + buyer |
| Using one material in every zone | Swelling or early wear at sink and laundry areas | Zone-based substrate and edge-sealing schedule | Designer + manufacturer |
| No unit or room coding | Misrouted cartons and installation delays | Packing list tied to building, floor, unit, room, and cabinet code | Factory + logistics team |
| Inspecting only after delivery | Rework spreads to many units | Pilot-unit sign-off and pre-shipment QC checklist | Buyer + factory |
| Treating hardware as an allowance | Door alignment and drawer failures | Hinge, slide, pull, loading, and adjustment specification | Designer + contractor |
Use this matrix during the first technical meeting: it turns multi-unit cabinet project mistakes into named controls with an accountable owner before they become site variations.
1. Releasing production before dimensions and interfaces are closed
The first major mistake is treating a “design-approved” layout as production-ready. A plan can look resolved while appliance cut sheets, finished floor levels, stone overhangs, service penetrations, and wall tolerances are still open. In a multi-unit project, a 10 mm discrepancy on a filler panel or pipe chase is not one snag; it can become dozens of site modifications.

Drawing controls that prevent multi-unit cabinet project mistakes
Before a purchase order is released, require elevation, plan, section, and cabinet schedule drawings that show each cabinet code, finished dimensions, appliance model, countertop thickness, service locations, toe-kick height, and opening direction. Record every “TBC” item in a dated exceptions log with an owner and final decision date. Do not leave a verbal site instruction as the only source of truth.
Use a pilot unit when site conditions are uncertain
For renovation projects or buildings with variable walls, produce and install one representative kitchen or bathroom first. Confirm fillers, scribe panels, appliance clearances, plumbing access, and door swing. Release repeated units only after the pilot is signed off. This adds a controlled early checkpoint; it is far less disruptive than changing a finished batch.
2. Specifying a look but not a build-up
“Warm white matte cabinets” is a design direction, not a manufacturing specification. It does not identify the door substrate, coating system, gloss level, edge construction, carcass décor, or allowable color variation. Two materials can look similar in a showroom and perform differently under kitchen steam, cleaning chemicals, or repeated tenant use.
Specify material by zone and exposure
For sink bases, laundry cabinets, and areas beside dishwashers, specify a moisture-appropriate carcass material, sealed cut edges, and details that keep standing water away from vulnerable panel edges. For high-traffic rental units, prioritize a finish that can be repaired or replaced consistently and hardware that can be adjusted after handover. The best option depends on the project, but the specification must explain why it is selected.
For a broader technical reference, link readers to KEJIA’s cabinet materials guide and align the project’s final material schedule with the approved shop drawings.
On mobile, swipe left or right to view all table columns.
| Project condition | Better specification question | Typical risk if omitted |
|---|---|---|
| Sink and laundry zones | Is the carcass moisture-resistant and are exposed cut edges sealed? | Edge swelling and delamination |
| High-turnover rentals | Can doors and hardware be adjusted or replaced from a controlled batch? | Uneven appearance and service calls |
| Premium hotel rooms | What sample defines sheen, grain direction, and visible joins? | Finish mismatch under room lighting |
| Coastal or humid markets | What is the packaging and storage protection before installation? | Moisture pickup and warped components |
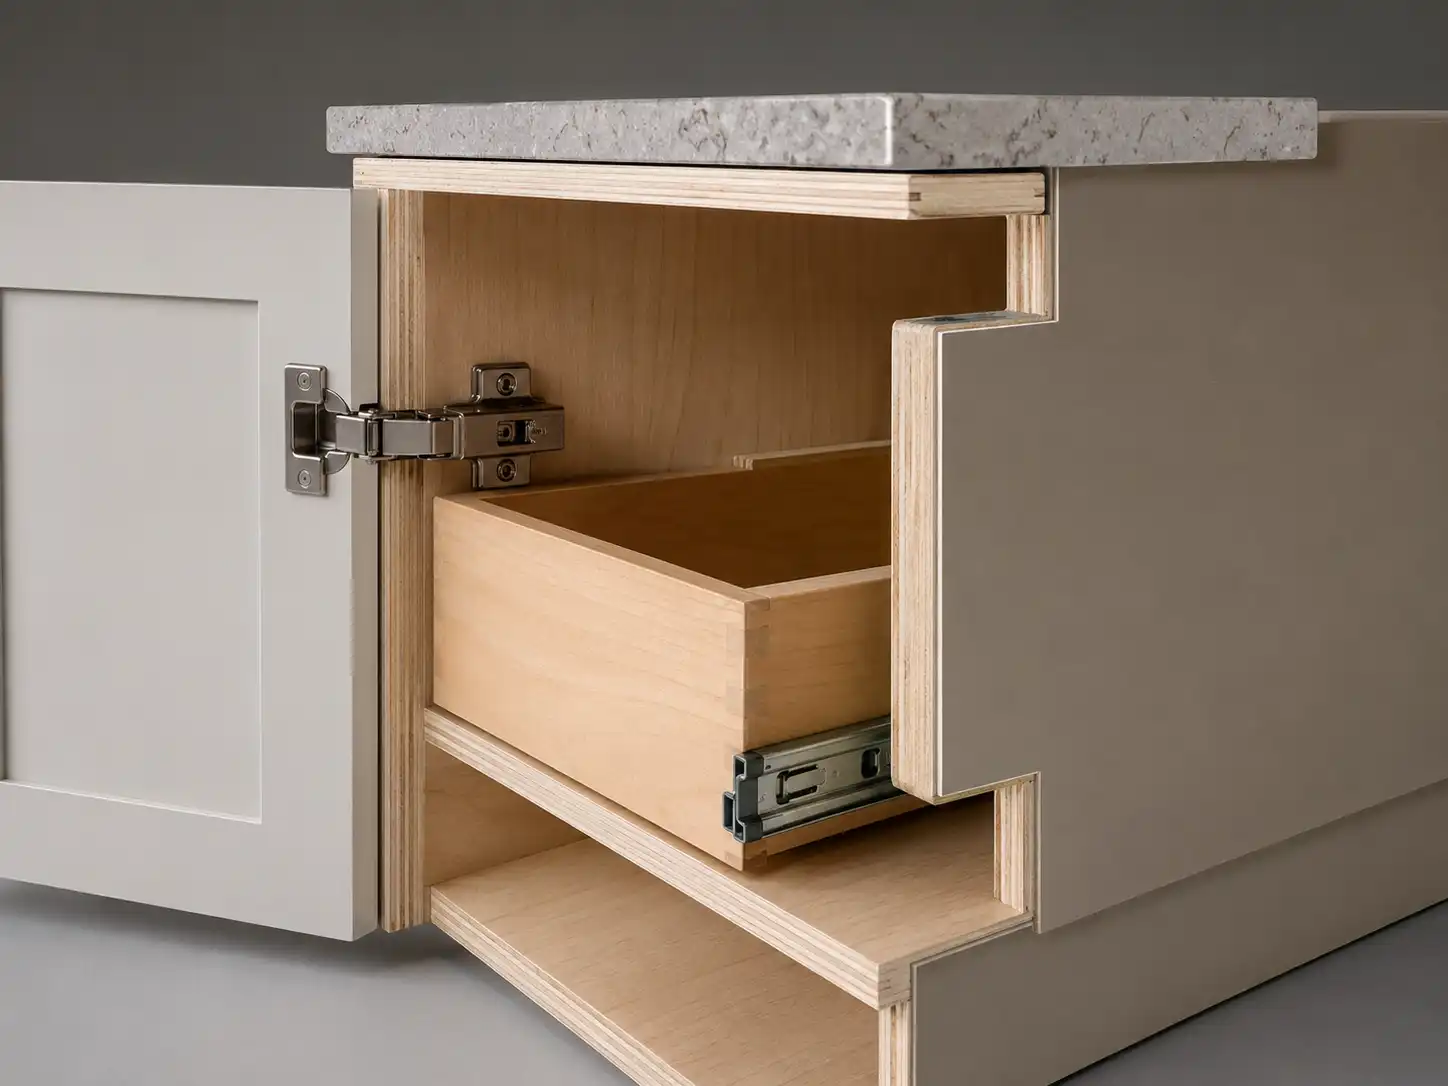
3. Approving a finish from a screen or a single small swatch
Digital renderings are useful for intent, but screens change color and cannot show texture, sheen, edge-band match, or grain repetition. A small swatch can also hide the visual effect of a large lacquered or wood-grain door. This is especially risky when cabinets from several production weeks must appear continuous across a building.
Build a sample approval record
Approve a physical sample set that includes the door face, edge treatment, carcass interior, handle or pull, countertop sample where applicable, and hardware. Photograph the signed sample under daylight and project lighting, record the batch or sample code, and keep it as the production reference. For veneer or directional wood grain, define the grain direction, acceptable variation, and the handling of matched pairs.
Factory perspective: KEJIA recommends locking the approved sample before mass production and retaining a reference panel at the factory. The production team can compare batch panels against the reference during incoming material and finished-product checks rather than relying on a color name alone. This is one of the simplest ways to stop multi-unit cabinet project mistakes caused by finish drift from spreading through a batch.
4. Leaving hardware, clearances, and services to the installer
Installers can adjust hinges, but they cannot solve a drawer that hits a pipe, a dishwasher door that cannot open, or a handle that conflicts with an adjacent panel. Hardware choices also affect hole patterns, reinforcement, loading, and the space needed behind a door or drawer.
Coordinate the interfaces before factory confirmation
Confirm appliance installation guides, sink and faucet cut-outs, electrical points, trap locations, ventilation grilles, stone support, and handles. State the hinge and drawer-slide grade, soft-close requirement, pull length and fixing centers, and any load-sensitive cabinet reinforcement. Where an MEP route is likely to change, provide an accessible service panel or a deliberate void rather than asking the installer to cut into a finished cabinet on site.
5. Losing control of unit codes, packing, and installation sequence
Bulk cabinets are easy to manufacture in batches and easy to lose on a busy site when packaging has no project logic. A carton marked only “base cabinet” creates unnecessary handling and increases the chance that one unit receives another unit’s fillers, doors, or hardware pack.

Make the packing list an installation tool
Use a structured code such as Building–Floor–Unit–Room–Cabinet. Put the code on drawings, carton labels, packing lists, and installation checklists. Separate loose hardware and accessories by the same code. Confirm carton limits, lift access, staging space, and the desired delivery sequence before packing begins.
For overseas delivery, agree whether factory packing must support container loading, local warehousing, or direct unit-level delivery. Clarify the applicable Incoterms® rule and handoff points so that the buyer, forwarder, and site team understand who controls each stage of the shipment.
Use KEJIA’s overseas cabinet shipping and packaging guide alongside the project packing plan. For the meaning and use of delivery terms, consult the ICC Incoterms® 2020 overview; this standard HTML link is dofollow unless the site owner changes it.
6. Skipping pilot, in-process, and pre-shipment inspections
A final visual check after containers arrive is too late to prevent repeated defects. Cabinets should be inspected at moments when correction is still practical: sample approval, first article or pilot unit, in-process review for critical dimensions and drilling, and pre-shipment inspection for finish, quantities, labeling, and packing.
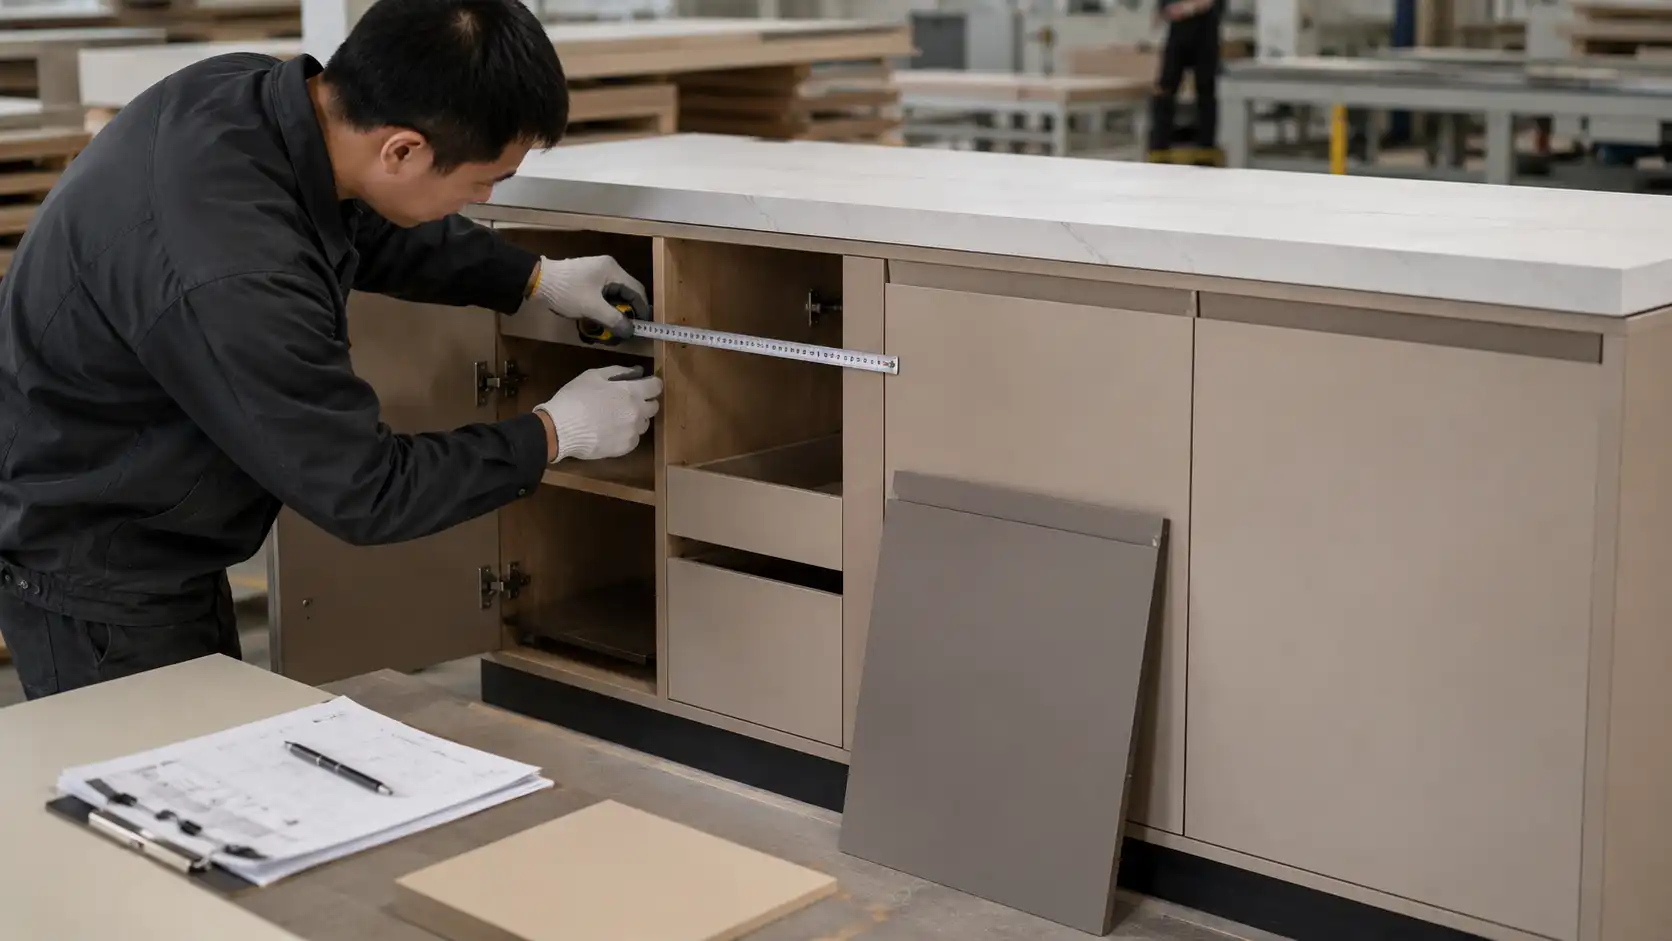
What a useful pre-shipment inspection checks
- Cabinet codes match the approved schedule and packing list.
- Door fronts, exposed panels, and visible grain directions match the approved reference.
- Critical opening dimensions, drill positions, and appliance interfaces are checked against the signed drawings.
- Hinges, slides, handles, legs, and connector packs are complete and correctly assigned.
- Carton protection, corner guards, moisture control where specified, and labels survive handling.
- A spare-parts list identifies replaceable doors, fillers, hardware, and touch-up materials.
Do not sample only the easiest units. Select multiple floors, room types, and cabinet codes, with extra attention to kitchens with appliances, wet-area cabinets, and end panels.
For an inspection baseline, link to the custom cabinet quality-control checklist and, where project requirements call for a recognized performance reference, review the ANSI/KCMA A161.1 cabinet performance standard. The external link is dofollow by default.
7. Assuming every wall and floor is square
Cabinet factories manufacture to approved dimensions; they cannot make a repeated rectangular box fit every irregular construction condition without an agreed tolerance strategy. Uneven walls, out-of-level floors, and poorly positioned services should be measured and managed before installation, not disguised with forced panels.
Plan tolerances deliberately
Identify where fillers, scribes, adjustable legs, and scribe panels are allowed. State the finished floor reference point and whether cabinets are installed before or after flooring. Give installers a measurement checklist and escalation route for units outside tolerance. If the project has building-to-building variation, split drawings and packing by building type rather than assuming one standard set fits all.
8. Buying on unit price without a replacement and handover plan
The lowest quoted cabinet package can become expensive when damaged parts cannot be identified, matched, or replaced. A responsible procurement comparison includes replacement lead time, retained finish reference, spare part quantities, hardware availability, packaging records, and the process for documenting transit or installation damage.
Compare proposals on total project risk
Ask each custom cabinet manufacturer to state what is included in drawings, samples, hardware, QC records, packing lists, spares, and after-sales support. Compare those inclusions beside price. A transparent proposal makes it easier to calculate both the purchase cost and the likely cost of rework.

Pre-production checklist to prevent multi-unit cabinet project mistakes
- Signed construction drawings, cabinet schedule, and unit-code matrix are complete.
- Appliance, stone, MEP, flooring, and wall-condition interfaces are resolved or logged as controlled exceptions.
- Door, carcass, edge-band, hardware, and countertop samples have been approved and recorded.
- Wet-zone material, edge sealing, and storage requirements are specified.
- Pilot unit criteria and release authority are agreed.
- QC hold points, inspection method, and reporting format are written into the order.
- Carton labels, packing list, accessories, site staging, and delivery sequence use the same code system.
- Spare parts, damage-report process, and replacement lead time are agreed before shipment.
Frequently asked questions
What is the first document that prevents multi-unit cabinet project mistakes?
Request the coordinated, signed-for-construction drawing package with cabinet codes and a schedule. It should connect the visual design to dimensions, appliances, services, materials, hardware, and each repeated unit type. A quotation alone is not enough to control production.
Should every apartment receive a full cabinet sample?
No. A representative pilot unit is usually more useful than separate samples for every apartment. It should include the highest-risk interfaces, such as appliances, wet areas, end panels, fillers, and countertop coordination. Release the repeated batch only after the pilot is accepted.
Which cabinet areas need the most moisture attention?
Sink bases, dishwasher sides, laundry cabinets, and bathrooms need deliberate substrate, sealing, ventilation, and installation details. The answer is not simply to use one “waterproof” label; confirm exposed edges, plumbing leak access, and how cabinets will be stored before fit-out.
How should cartons be labeled for a large project?
Label each carton using a unique code that maps to the approved drawings: building, floor, unit, room, and cabinet code. The same code should appear on the packing list and loose-hardware pack. This lets the site team stage and install in sequence without opening every carton.
What should be checked at pre-shipment inspection?
Check quantity, cabinet codes, critical dimensions, finish against the approved sample, drilling, hardware, labels, loose parts, and packaging protection. Sample different unit types and floors rather than inspecting only one convenient group. Photograph findings against the cabinet code and agree corrective action before loading.
Can installers correct factory drawing errors on site?
Only minor adjustments should be left to installers. Hinges, legs, and allowed scribes can absorb normal variation. Appliance conflicts, incorrect cabinet widths, wrong drill patterns, or missing service voids should be resolved before production because site cutting can damage finishes and delay multiple trades.
How many spare parts should a multi-unit order include?
The right quantity depends on unit count, finish type, and project risk. Agree a named spare-parts list rather than relying on a percentage alone. It commonly includes selected door fronts, fillers, hardware, connectors, touch-up materials, and clearly documented replacement ordering steps.
Turn the cabinet package into a controlled project scope
Multi-unit cabinet delivery becomes more reliable when design intent, factory production, packaging, and site installation use the same information. Preventing multi-unit cabinet project mistakes begins with a controlled scope, not a late-site workaround. Send your drawings, unit schedule, target market, and delivery constraints for a cabinet specification review, project quotation, and packing-plan recommendation before mass production.