





Cabinet Installation Checklist: 12 Proven Tips to Avoid Costly Errors
Quick answer: A cabinet installation checklist is the most reliable way to close the gap between design drawings, real site conditions, and factory production information before any panel is cut. Contractors and developers should verify final dimensions, wall and floor conditions, service locations, appliance data, cabinet codes, material interfaces, and installation sequence during the drawing-review stage. A cabinet may be produced exactly to its drawing and still fail at installation if the drawing used an old site measurement, ignored a beam, omitted a filler, or did not coordinate plumbing and electrical points. The goal is not more paperwork; it is a single approved information set that installers can use without making assumptions.
Who this guide is for
- Contractors responsible for kitchen, wardrobe, vanity, or whole-house cabinet installation.
- Developers managing repeat apartment layouts and handover dates.
- Architects and interior designers issuing cabinet drawings for manufacturing.
- Overseas project buyers sourcing custom cabinets from a factory.
Key takeaways
- Production drawings must be checked against final site measurements, not only design intent.
- Cabinet installation depends on walls, floors, ceilings, services, appliances, stone, and doors—not on cabinetry alone.
- The factory and contractor need one controlled revision number for every approved drawing set.
- Cabinet coding, labels, packing lists, and installation drawings must use the same language.
- A pilot unit or first-install review prevents repeated errors across multi-unit projects.
The pre-production controls that prevent installation failures
On mobile, swipe left or right to view all table columns.
| Control point | What to verify | Installation problem prevented | Responsible party |
|---|---|---|---|
| Site measurement | Finished floor level, wall lengths, ceiling height, plumb and level condition | Cabinets that do not fit, uneven gaps, wrong plinth height | Contractor with designer confirmation |
| Drawing review | Cabinet dimensions, fillers, scribes, panel returns, opening directions | Missing closure panels, clashes, unusable doors or drawers | Designer, contractor, manufacturer |
| Services coordination | Plumbing, electrical, gas, ventilation, sockets, lighting, appliance data | Blocked connections, unsafe cuts, appliance fit issues | MEP contractor and cabinet installer |
| Material specification | Panel thickness, finish, edge treatment, hardware, moisture-risk areas | Premature damage, poor screw holding, wrong finish or durability | Designer and manufacturer |
| Production coding | Unit, room, cabinet code, carton sequence, revision | Lost components, wrong-room installation, delays | Manufacturer and site receiving team |
| Pilot installation | One representative kitchen, vanity, or apartment unit | Repeated errors in a batch rollout | Contractor, developer, manufacturer support |
Why installation problems begin before the factory starts production
Cabinet installers are often asked to solve issues that should have been resolved in the drawings. A wall is out of plumb, but no scribe or filler was specified. A dishwasher size changed, but the cabinet opening stayed the same. An outlet sits behind a drawer. A ceiling bulkhead is lower than the design model. The factory then receives incomplete or superseded information and manufactures a technically correct but site-incompatible cabinet.
Custom cabinetry is especially sensitive because the final product connects to many completed surfaces and systems. Base cabinets depend on finished floor level; wall cabinets depend on actual ceiling and bulkhead conditions; tall units depend on door swing, appliance ventilation, and anchoring; vanities depend on plumbing centres and waterproofing. If each trade works from a separate drawing revision, site improvisation becomes likely.
The preventive method is simple: conduct a documented pre-production review after the site is measured and before material ordering or CNC nesting begins. The review should produce clear approvals, exceptions, and responsibilities. Do not use verbal confirmation as the final instruction for a project with repeated units or custom finishes.
What should be measured on site before cabinet production?
Measure the building after the relevant structural and finishing milestones are stable. A preliminary design dimension can guide budgeting, but final production dimensions should be based on an agreed measurement status. At minimum, the contractor should record:
- Finished floor level at multiple points, including any slope or transition.
- Wall-to-wall width and depth at base, worktop, and wall-cabinet heights.
- Ceiling height, bulkhead depth, sprinkler heads, vents, and access panels.
- Wall plumb, floor level, and corner condition where cabinets meet walls.
- Door openings, window trims, lift dimensions, and delivery route constraints.
- Plumbing centres, drain positions, isolation valves, sockets, switches, gas points, and ventilation routes.
- Appliance model numbers and installation manuals, including ventilation and service clearances.
- Stone, tile, wall panel, skirting, and flooring thicknesses at cabinet interfaces.
For multi-unit developments, do not assume every apartment is identical because the drawings are repeated. Check a representative set of units and identify structural or finish deviations. If the project requires one standard cabinet module, agree what installation tolerance or filler strategy will absorb the variation.
How to turn a design drawing into a production-ready cabinet drawing

A design drawing communicates layout and visual intent. A production-ready drawing also communicates how every cabinet is built, identified, installed, and coordinated. Before approval, the drawing set should show cabinet codes, dimensions, materials, door and drawer directions, hardware, fillers, panels, service cut-outs, anchoring zones, appliance openings, and installation notes.
Use a controlled revision process
Every document sent to the factory should show a drawing title, project name, date, and revision number. When a change is issued, identify what changed and which cabinet codes are affected. The contractor should withdraw superseded drawings from the installation area so the site team does not assemble a cabinet from the old layout.
Specify tolerances and adjustment zones
Cabinets need practical adjustment space. A wall may vary, a floor may fall, or a stone top may need a small tolerance. Use fillers, scribes, adjustable legs, panel returns, and clear installation allowances where needed. Do not depend on an installer to cut finished doors or decorative panels to solve an unplanned construction deviation.
Coordinate appliance and service requirements early
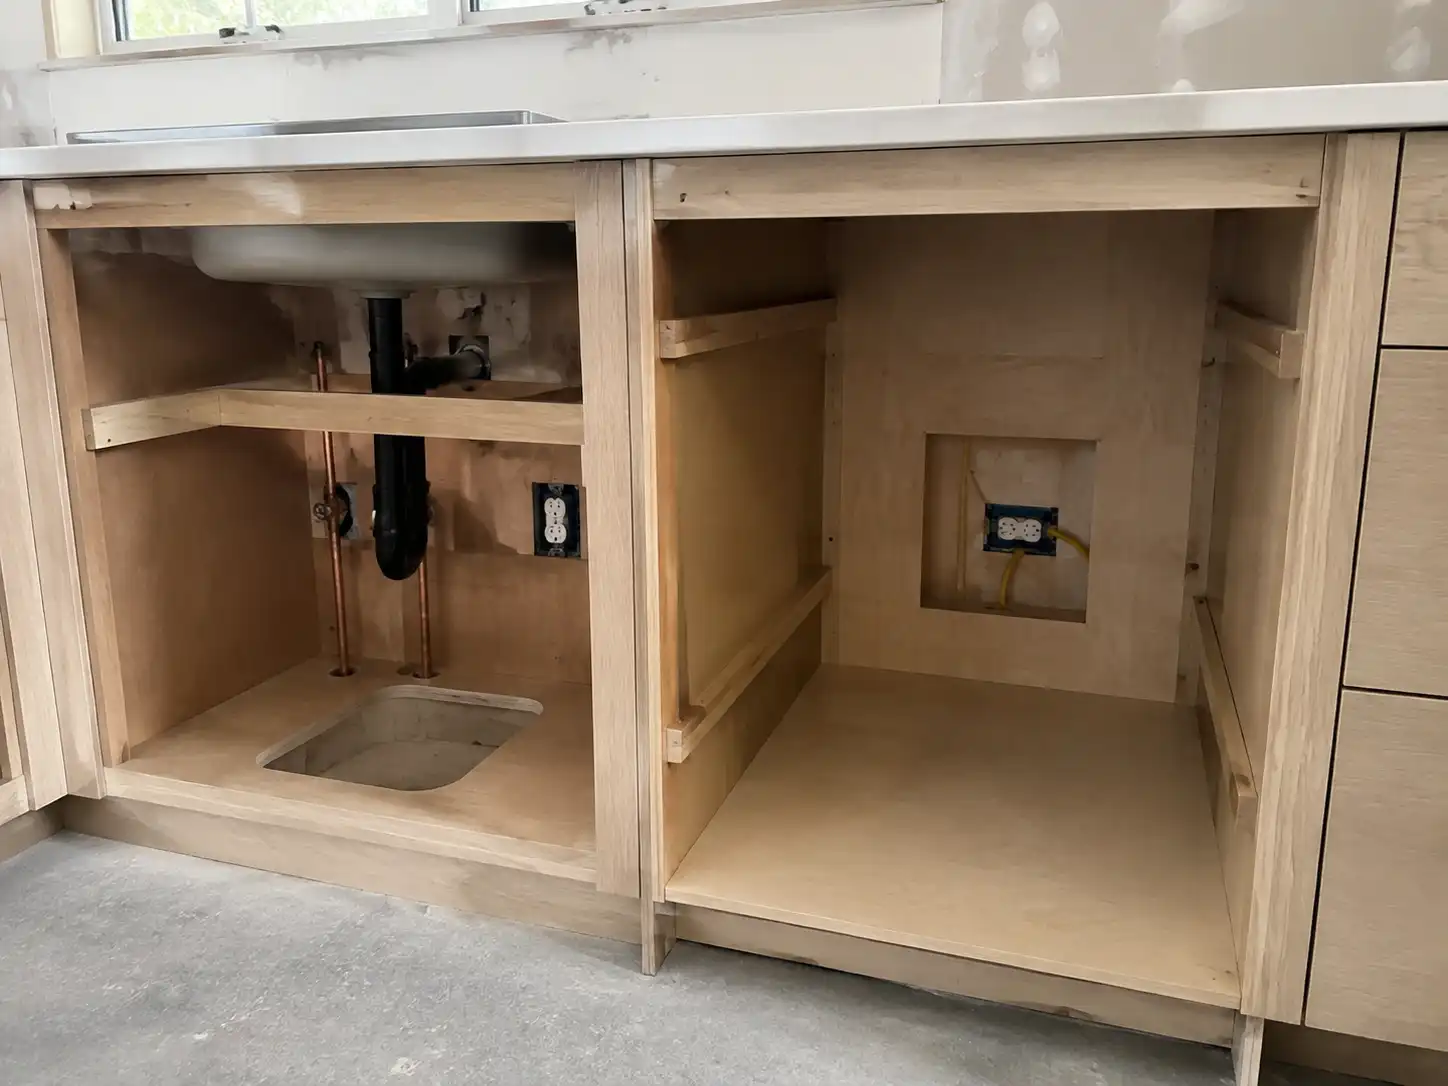
Ask for appliance installation information before approving cabinet openings. Refrigerator ventilation, oven clearances, dishwasher door geometry, sink-bowl position, trap clearance, and extractor duct routes affect cabinet construction. The same applies to lighting drivers, socket access, and wall reinforcement for tall units.
Factory insight: the drawing review KEJIA should complete
At KEJIA, factory drawing review should be a technical gate before production rather than a simple acknowledgement of receipt. The team should compare the cabinet schedule with elevations, plans, finishes, hardware list, and site information. Conflicts should be returned as written questions or marked drawings before the client releases production.

For sink bases and bathroom vanities, the review should identify moisture exposure, plumbing cut-outs, edge sealing, and required access. For tall cabinets and wall-hung units, it should clarify wall type, fixing points, and any reinforcement required from the building contractor. For lacquer, veneer, PET, and dark finishes, it should confirm colour batch, grain direction, protective film, and which panels must be visually matched.
The manufacturer should also check that cabinet codes flow into the BOM, labels, packing list, and installation drawing. This simple discipline helps the receiving team find the right parts for the right room. It is particularly valuable when identical-looking cabinets serve different unit layouts.
Six common mistakes and how to prevent them
1. Producing from preliminary measurements
Preliminary measurements often change after plastering, tiling, flooring, or bulkhead work. Confirm the site status and record final measurements before releasing the production drawing. If an area is not stable, defer that cabinet or use a formally agreed tolerance solution.
2. Omitting fillers, scribes, and end panels
Perfectly square dimensions are rare on live sites. Without planned adjustment zones, installers may force cabinets against uneven walls or cut visible finished components. Specify the location, width, finish, and cutting allowance for each filler or scribe.
3. Treating appliances as generic rectangles
Appliance dimensions, ventilation, handles, hinges, and service connections vary by model. Use the selected appliance manual and verify the final model number. This prevents doors colliding, ovens overheating, or plumbing blocking drawers.
4. Leaving MEP coordination until installation
Sockets, pipes, drains, and ducts cannot be moved casually after cabinets arrive. Hold a coordination review with the MEP contractor and identify required access panels, service voids, and no-drill zones in the cabinet drawings.
5. Packing and labeling by product type instead of room
When all doors, panels, or hardware arrive in mixed cartons, installers spend time searching and can fit parts in the wrong room. Require unit, room, cabinet code, and carton sequence on the labels and packing list.
6. Skipping a pilot installation on repeat projects
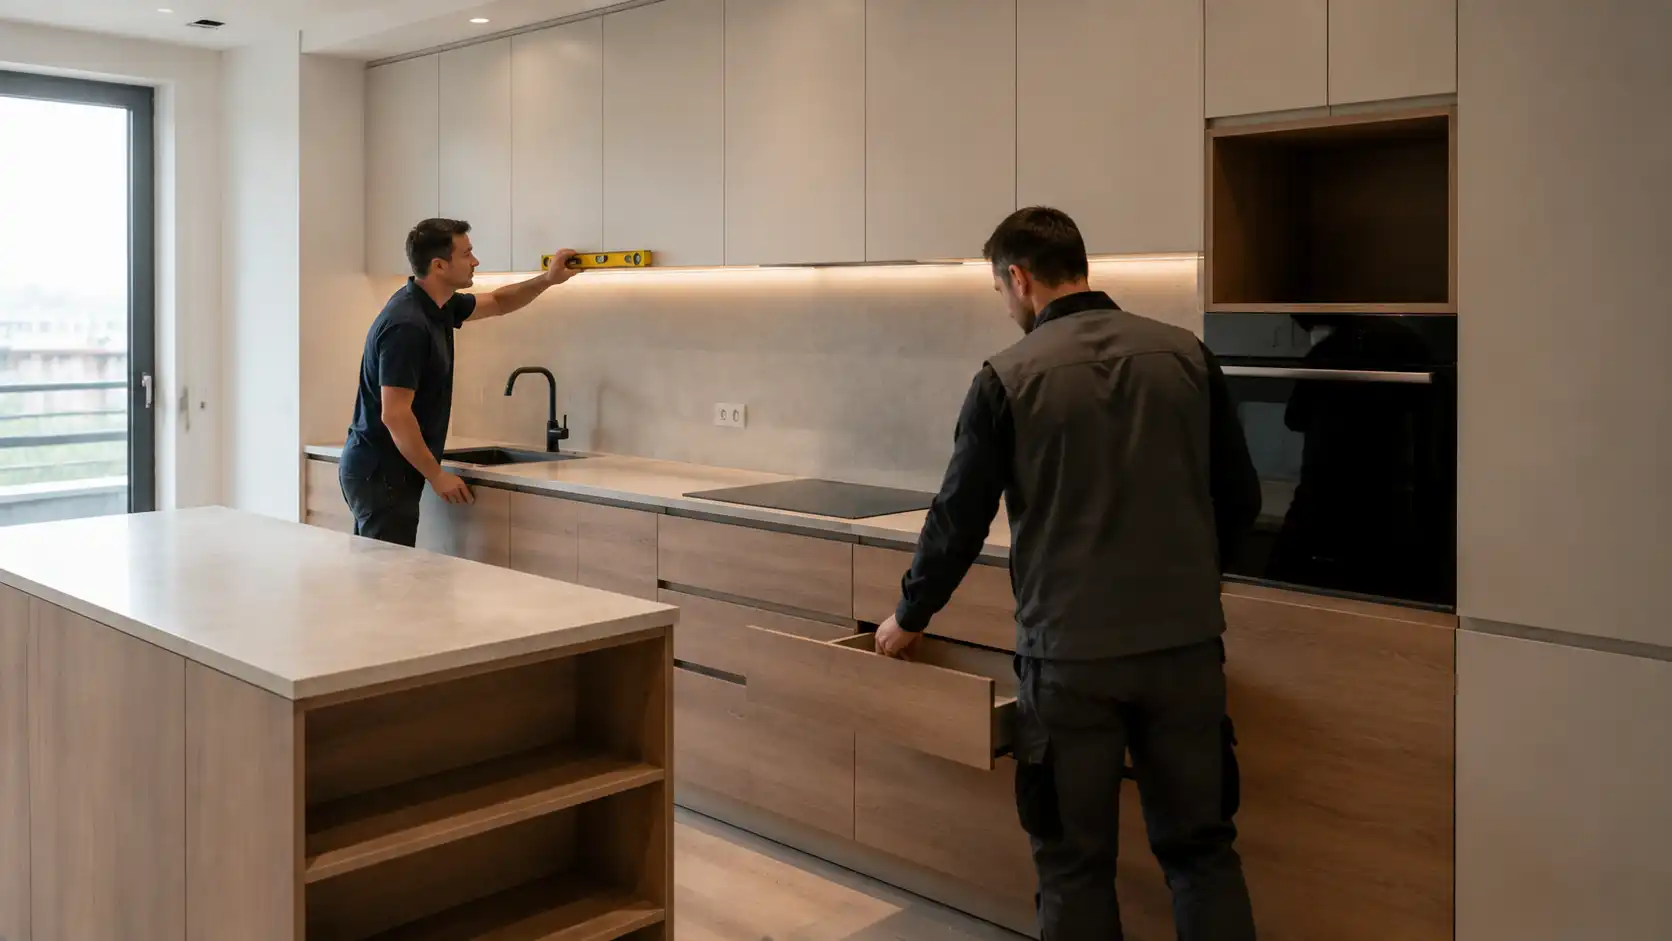
If the first unit exposes a small drawing or site error, repeating it across 50 apartments multiplies the cost. Install and inspect one representative unit before releasing the full installation sequence whenever the programme allows.
Cabinet installation checklist before production
- Confirm the final site-measurement date and the areas included in it.
- Approve one coordinated drawing set with a visible revision number.
- Verify finished floor, ceiling, wall, tile, stone, and skirting interfaces.
- Confirm appliance models, installation manuals, and required ventilation clearances.
- Mark all plumbing, electrical, gas, ventilation, lighting, and access-panel positions.
- Identify cabinet fillers, scribes, adjustable legs, end panels, and tolerance zones.
- Confirm materials for wet areas, including edge sealing and service cut-out treatment.
- Check wall construction and fixing/reinforcement requirements for tall and wall-hung cabinets.
- Make cabinet codes consistent across drawings, BOM, carton labels, and packing lists.
- Approve packing format, delivery route, receiving inspection, and dry storage location.
- Prepare a pilot-unit inspection record and escalation route for issues.
- Agree spare panels, hardware, and touch-up items before shipment.
Frequently asked questions
When should final cabinet measurements be taken?
Take final measurements when the relevant walls, floors, ceilings, and fixed services have reached the agreed stable condition. For example, kitchen base-cabinet dimensions should reflect finished floor level and relevant wall finishes. If a finish is still incomplete, document the assumed build-up and responsibility for any change.
How much filler should be allowed beside a cabinet?
There is no universal figure. The needed allowance depends on wall variation, cabinet run length, finish, door opening, and whether a scribe panel is used. The designer and installer should identify adjustment zones from the site survey instead of applying one generic dimension.
Can the factory solve an out-of-plumb wall?
The factory can design fillers, scribes, adjustable legs, and panel allowances when it receives accurate measurements and a clear instruction. It cannot safely predict unmeasured wall variation. The contractor should identify the condition during drawing review.
What information should a contractor send with cabinet drawings?
Send final site dimensions, reflected ceiling information, wall and floor conditions, appliance specifications, service locations, finish build-ups, access constraints, installation sequence, and the latest revision record. Photos and marked site elevations can help clarify unusual conditions.
Why are cabinet codes important during installation?
Cabinet codes create a common reference across drawings, production, packing, receiving, and installation. They let a site team identify the correct box, door, hardware, and panel for a specific room. This reduces sorting time and prevents parts being used in the wrong unit.
Should contractors install a sample unit first?
For repeated apartments, hotel rooms, or standardized kitchen runs, yes. A pilot installation verifies fit, access, service coordination, door alignment, and installer understanding before the same issue spreads across the project. Record agreed corrections and apply them through a controlled revision.
Prevent installation issues while changes are still inexpensive
Cabinet installation becomes predictable when the project controls information before production. Final measurements, coordinated drawings, service checks, tolerance zones, coding, packing, and a pilot-unit review turn possible site surprises into decisions made while they are still manageable. That protects the programme, finish quality, and relationship between the contractor, developer, and manufacturer.
Send KEJIA your latest drawings, site measurements, appliance schedule, and destination details for a cabinet specification and production-readiness review. We can identify drawing gaps, recommend packing and labeling logic, and prepare a project quotation before production begins.